Setup
How to set up Microsoft Advertising from zero: account, UET tag, goals, import and Clarity
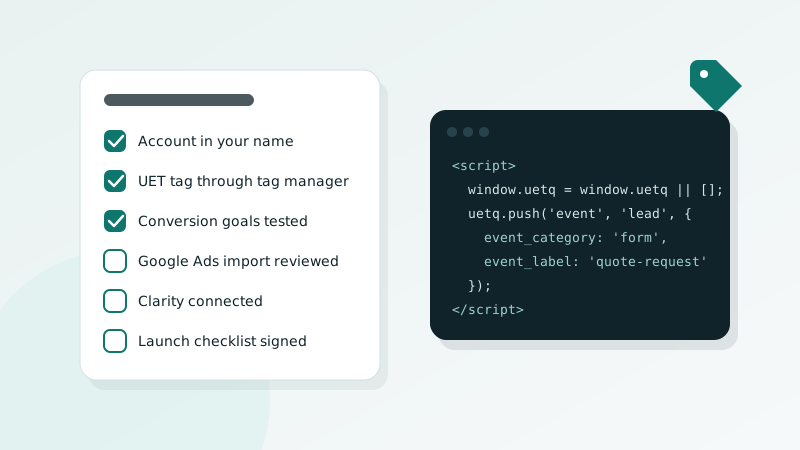
An account built correctly in week one saves months of cleanup later. This is the sequence we follow when a business starts Microsoft Advertising from nothing, and the version we wish every imported account had followed. It covers ownership, the UET tag, conversion goals, importing from Google without inheriting its problems, and connecting Microsoft Clarity.
Create the account the right way
Start with ownership. The Microsoft Advertising account should be created under a Microsoft account that belongs to the business, not to an employee and not to an agency. Use a role-based address that will survive staff changes, and secure it with multi-factor authentication. If an agency manages the account, it should be added as a user with the appropriate role or linked through a manager account. It should never be the owner.
Next come the settings that are painful to change later: currency, time zone and billing. Time zone affects ad schedules and daily reporting, so set it to where your business operates. Choose the billing arrangement that matches how you want to pay, and complete the advertiser verification steps when prompted, since some formats and categories will not serve until identity is confirmed.
Agree on a naming convention before the first campaign exists. Something like market, network, theme and match type in a fixed order keeps reports readable and makes filtering trivial as the account grows. Rename later and you lose the ability to compare history cleanly.
Install the UET tag through tag manager
The Universal Event Tracking tag is the foundation of everything else. Conversion goals, remarketing lists, enhanced conversions and the audience data behind in-market targeting all depend on it. Create one UET tag per account in the conversion tracking section and deploy it on every page of the site through your tag manager, so it fires once per pageview and can be updated without touching site code.
Verify the installation with the UET Tag Helper browser extension and confirm in the account that the tag status shows it is receiving traffic. Then enable enhanced conversions, which lets hashed first-party data such as the email address from a submitted form improve conversion matching when cookies are limited. Your tag manager setup needs to pass that data at the moment of conversion, so plan the data layer with whoever maintains your site.
If your site shows a consent banner, make sure the tag respects the visitor's choice. Microsoft supports consent signals for UET. Wire them to your consent platform so measurement stays compliant without disappearing entirely. The official Microsoft Advertising help center documents the current tag options and is worth bookmarking, because they change.
Define conversion goals that mean something
A conversion goal should represent a real business action, not a pageview that happens to be easy to measure. Typical goals are a lead form submission, a phone call from the site, a booked appointment, a purchase with revenue, or a trial or demo request. Create each as a UET-based goal using the type that fits: a destination URL goal for a thank-you page, an event goal for a button click or form submission pushed through the tag, or a product and revenue goal for e-commerce.
Decide how each goal counts. A lead form should usually count once per click, because the same person submitting twice is still one lead. A purchase should count every conversion along with its revenue value. Set the conversion window to match your sales cycle rather than leaving a default that undercounts long decisions.
Then separate goals that should drive bidding from goals that are useful but secondary. Micro-conversions such as a pricing page view can be tracked without being included in the conversion count your bid strategy optimizes toward. Test every goal with a live event before launch and confirm it appears in the account. A goal that never records is worse than no goal, because it makes the campaigns look like they are failing.
Import from Google Ads without importing its problems
The Google Ads import tool copies campaigns, ad groups, keywords, ads, extensions and negatives in minutes. Use it, but treat the output as a draft. Review these items before anything spends.
- Bid strategies and targets. A target CPA or target ROAS tuned for Google's auction rarely fits Bing's. Start closer to manual or enhanced CPC until you have conversion data, then move to automated bidding.
- Location targeting. Confirm that the targeting method, radius settings and the choice between people in a location and people searching for it are set deliberately.
- Ad schedules and time zones. Imported schedules were written against Google's account time zone. Confirm they still mean what you want.
- Network settings. Decide per campaign whether search partners and the Microsoft Audience Network should be on. Many imports arrive spending on placements nobody chose.
- Audiences. Remarketing lists do not transfer. They need the UET tag and must be rebuilt inside Microsoft Advertising.
- Negative keywords. Keep Google's negatives, then add Bing-specific ones from your first search term reports.
Scheduled sync can keep bids, budgets and new keywords aligned with Google automatically. Set it to sync only what you want synced. If you manage Microsoft bids independently, exclude bids from the schedule, or your weekly changes will be overwritten the next time it runs.
Add Clarity and connect it
Microsoft Clarity is free, records sessions, builds heatmaps and integrates with Microsoft Advertising so you can filter recordings by campaign. Create a project, add its tag through the same tag manager, and connect it to the ad account. Within a day you will see how visitors from each campaign move through the landing page, where they hesitate and what they click instead of your call to action. Clarity masks form input by default. Keep it that way.
Clarity is also the fastest way to catch a broken page after launch. A spike in dead clicks or rage clicks on a button usually means the button stopped working before any conversion report will tell you.
Pre-launch checklist
Before the first campaign goes live, confirm every line.
- Account owned by the business, agency added as a user, multi-factor authentication on
- Currency, time zone, billing and advertiser verification complete
- UET tag on every page, verified, enhanced conversions enabled, consent wired
- Conversion goals created, tested with live events, bidding goals separated from secondary goals
- Google import reviewed line by line, sync rules set deliberately
- Audiences rebuilt, network settings chosen per campaign
- Clarity connected and recording
- Landing pages fast on desktop and mobile, with every button firing its event
None of this is glamorous, and all of it is the difference between an account that can be optimized and one that produces noise. Once the foundation is right, the interesting work on strategy and creative can begin.
Key takeaways
- Create the account under a business-owned Microsoft login with multi-factor authentication; agencies are users, never owners.
- Deploy one UET tag site wide through tag manager, verify it, and enable enhanced conversions.
- Build conversion goals around real business actions, test each with a live event, and separate bidding goals from secondary ones.
- Treat a Google Ads import as a draft: review bids, locations, schedules, networks, audiences and negatives before spending.
- Connect Microsoft Clarity on day one to see what visitors do and to catch broken pages early.
Would you rather have this built for you, in your name, with documentation you can hand to anyone? Tell us where your setup stands and we will propose the scope that fits.